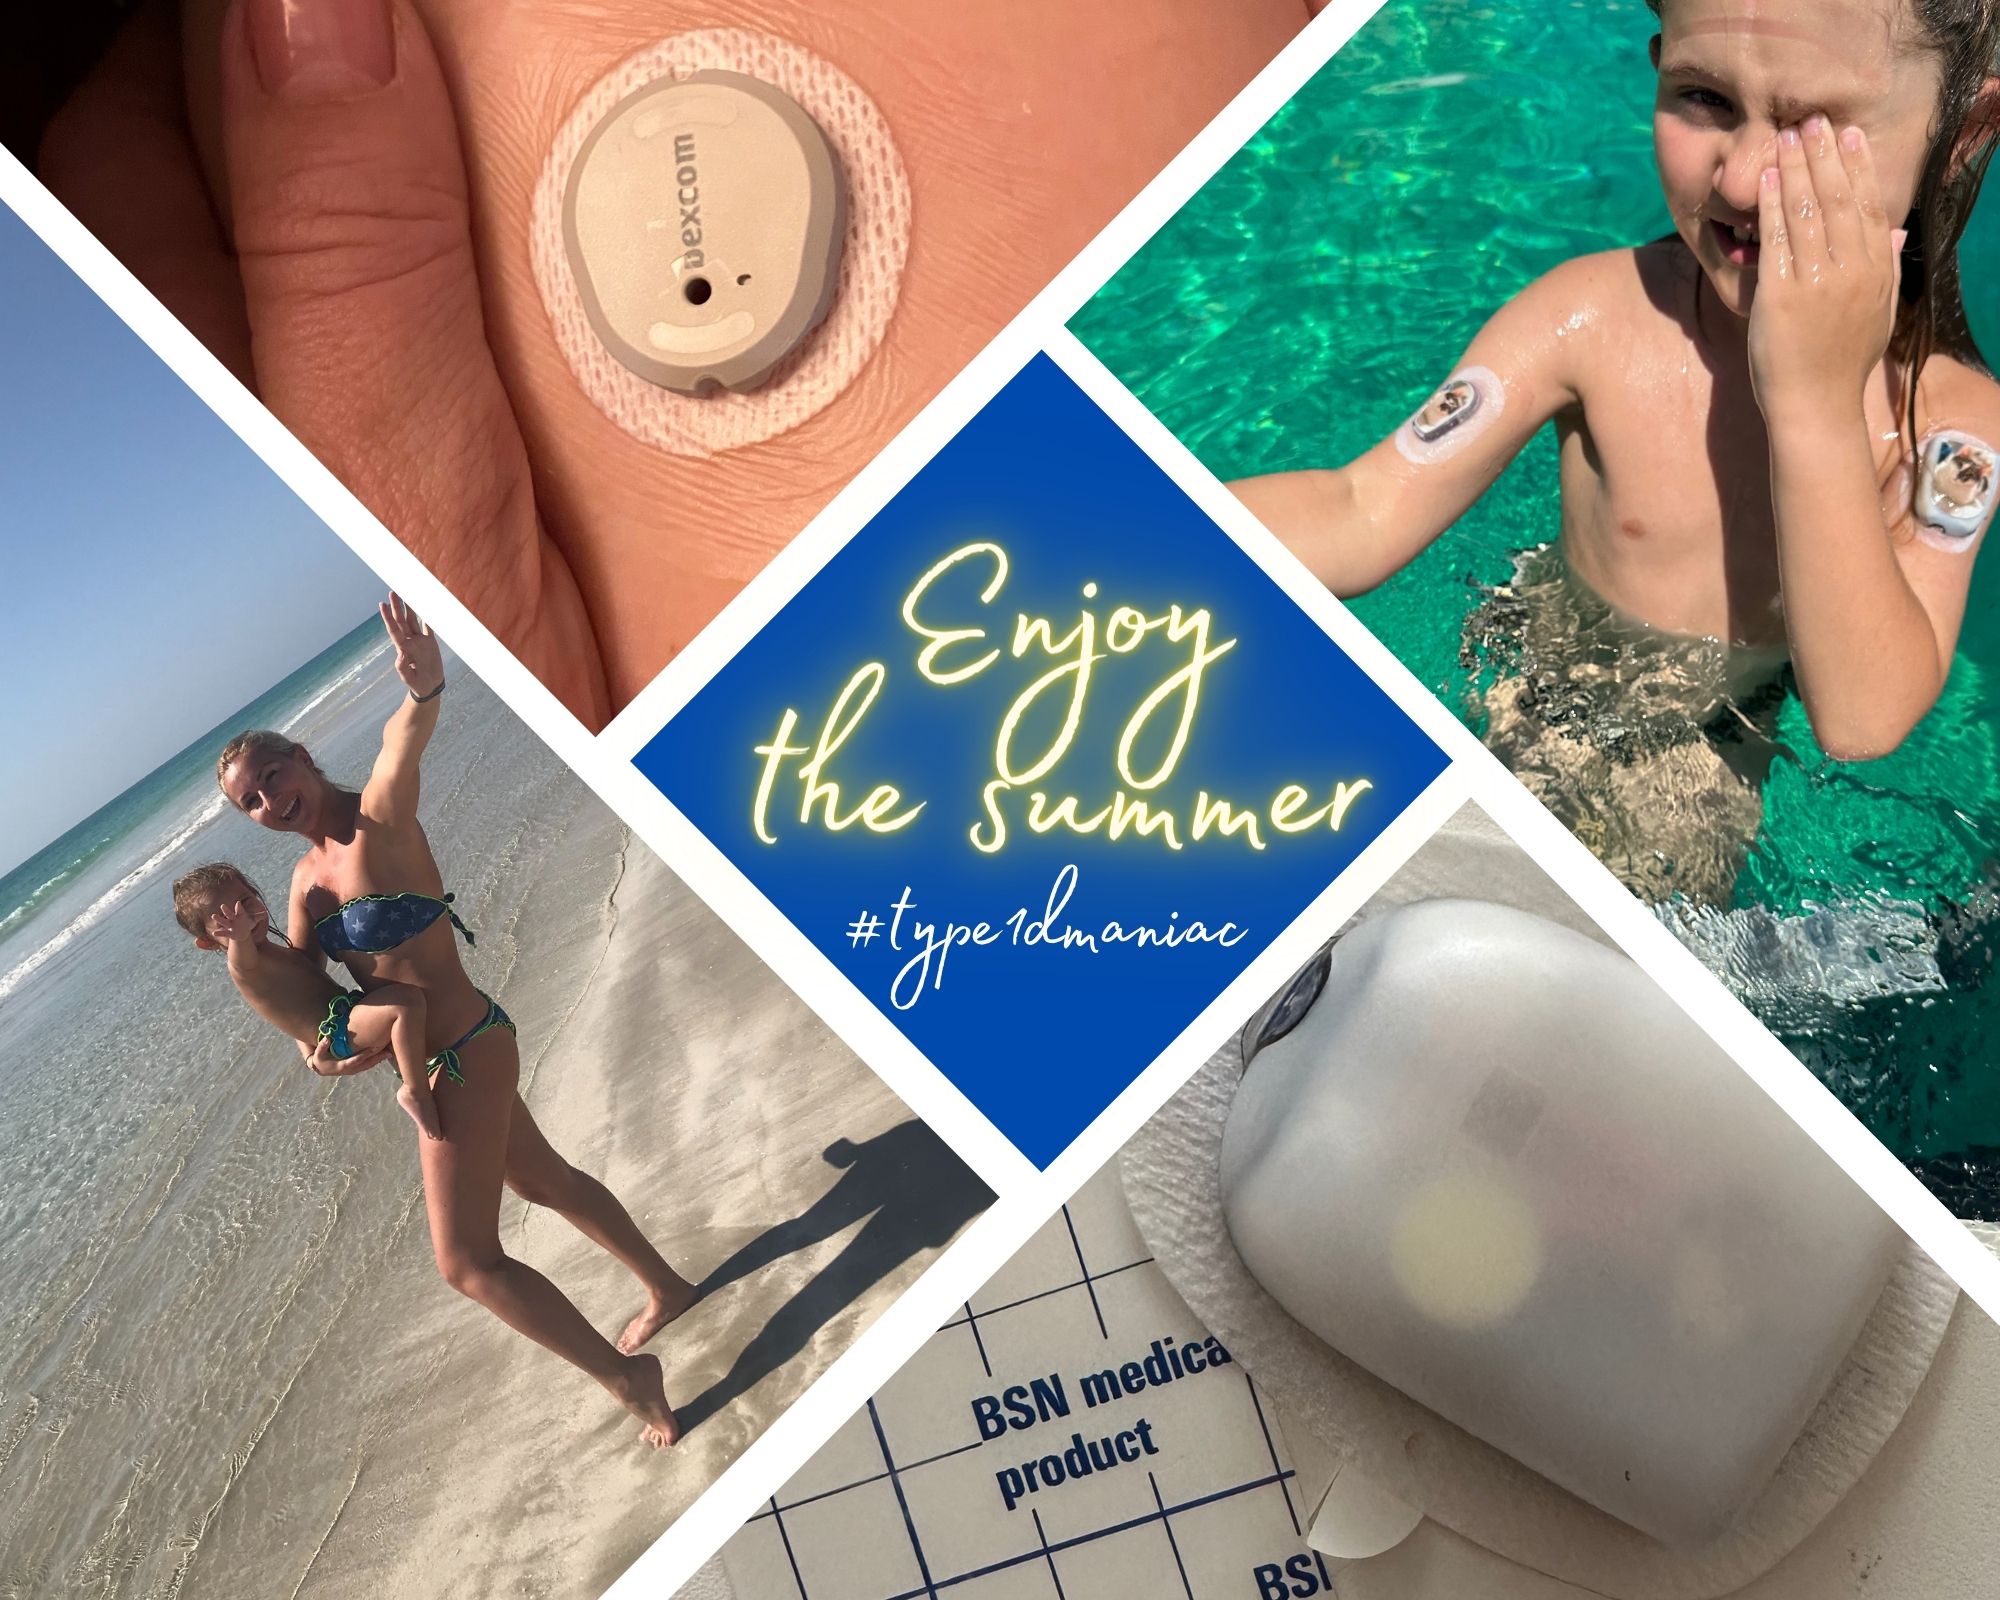
Living with diabetes is a constant challenge, and the summer season can bring additional obstacles. As the weather gets warmer and vacations approach, many people wonder how to keep their medical devices securely attached to their skin during water activities. In this article, I will share our personal tips and experiences on how we keep our devices in place during the summer, particularly for my small daughter who spends hours in the water, whether it’s in the pool or the sea. These strategies have proven to be effective for us and have helped us confidently manage diabetes while enjoying the summer fun. So, let’s dive into the topic and explore the tips that work best for us in keeping our devices secure during the summer months.

Mia is currently using the Dexcom G6 continuous glucose monitoring (CGM) system and the Omnipod insulin patch pump. This means that we change her CGM sensor every 10 days (if it’s working properly) and her pump every 3 days.
While planning for longer periods of daily water activities, I have found it preferable to apply Mia’s devices on her arms instead of her legs. This choice is mainly to avoid any potential premature failure of the Dexcom G6 sensor. By placing the devices on her arms, we have experienced better durability and reliability throughout our water-based activities. Even with these precautions in place, it’s important to note that avoiding earlier failure is not guaranteed.
Rule number one: Plan to change the devices at least 12 hours before going into the water. This allows the adhesive to securely dry and attach to the skin for a perfect fit. I have found that the best time to do this is in the evening, after showering and having dinner, when the skin is well dried.
Once you have chosen the right time and ensured that your skin is well-dried, let’s move on to step number 1: remove any possible grease from the skin. I came across this helpful tip in the Italian community, the best and only solution for us is “Alcool rosa” or denatured pink alcohol.
After the alcohol has dried, the next important step for us is to protect the skin and Mia from any potential allergic reactions. (Yes, we have them too! I’ll share some tips on that separately later.) But for now, let’s focus on the next step for water resistance I learned from community: Fixomull transparent.

Fixomull is a thin, transparent adhesive film that provides excellent water resistance. Once applied to your skin (following the previous steps), it forms a second skin-like barrier. I’ve found that the best way to use Fixomull is as an underpatch, either directly on the skin or on the adhesive of the medical device you’re applying. When using Fixomull transparent foil as an underpatch, a common question arises about whether to make a hole in it for the application injector. This is a personal choice and can vary among individuals. However, note that some people may have reactions to adhesives, so I recommend to avoid placing the hole and getting too close to the original patch of the device.
To ensure and further reinforce the attachment, I always use liquid glue, especially when we’re on vacation and far from home. Some people use spray glue for sports, but my preferred choice is Skin Tac. I find the vet wipes to be perfect for traveling as they are more practical. Skin Tac is also available in a liquid form in a glass bottle, which lasts a really long time (if you can even finish the bottle!). However, it’s not as convenient for travel. In the US, Skin Tac is widely used and considered the number one choice. There is also an alternative I know from the Italian market we haven’t tried yet called Mastisol, which comes in small flacons.
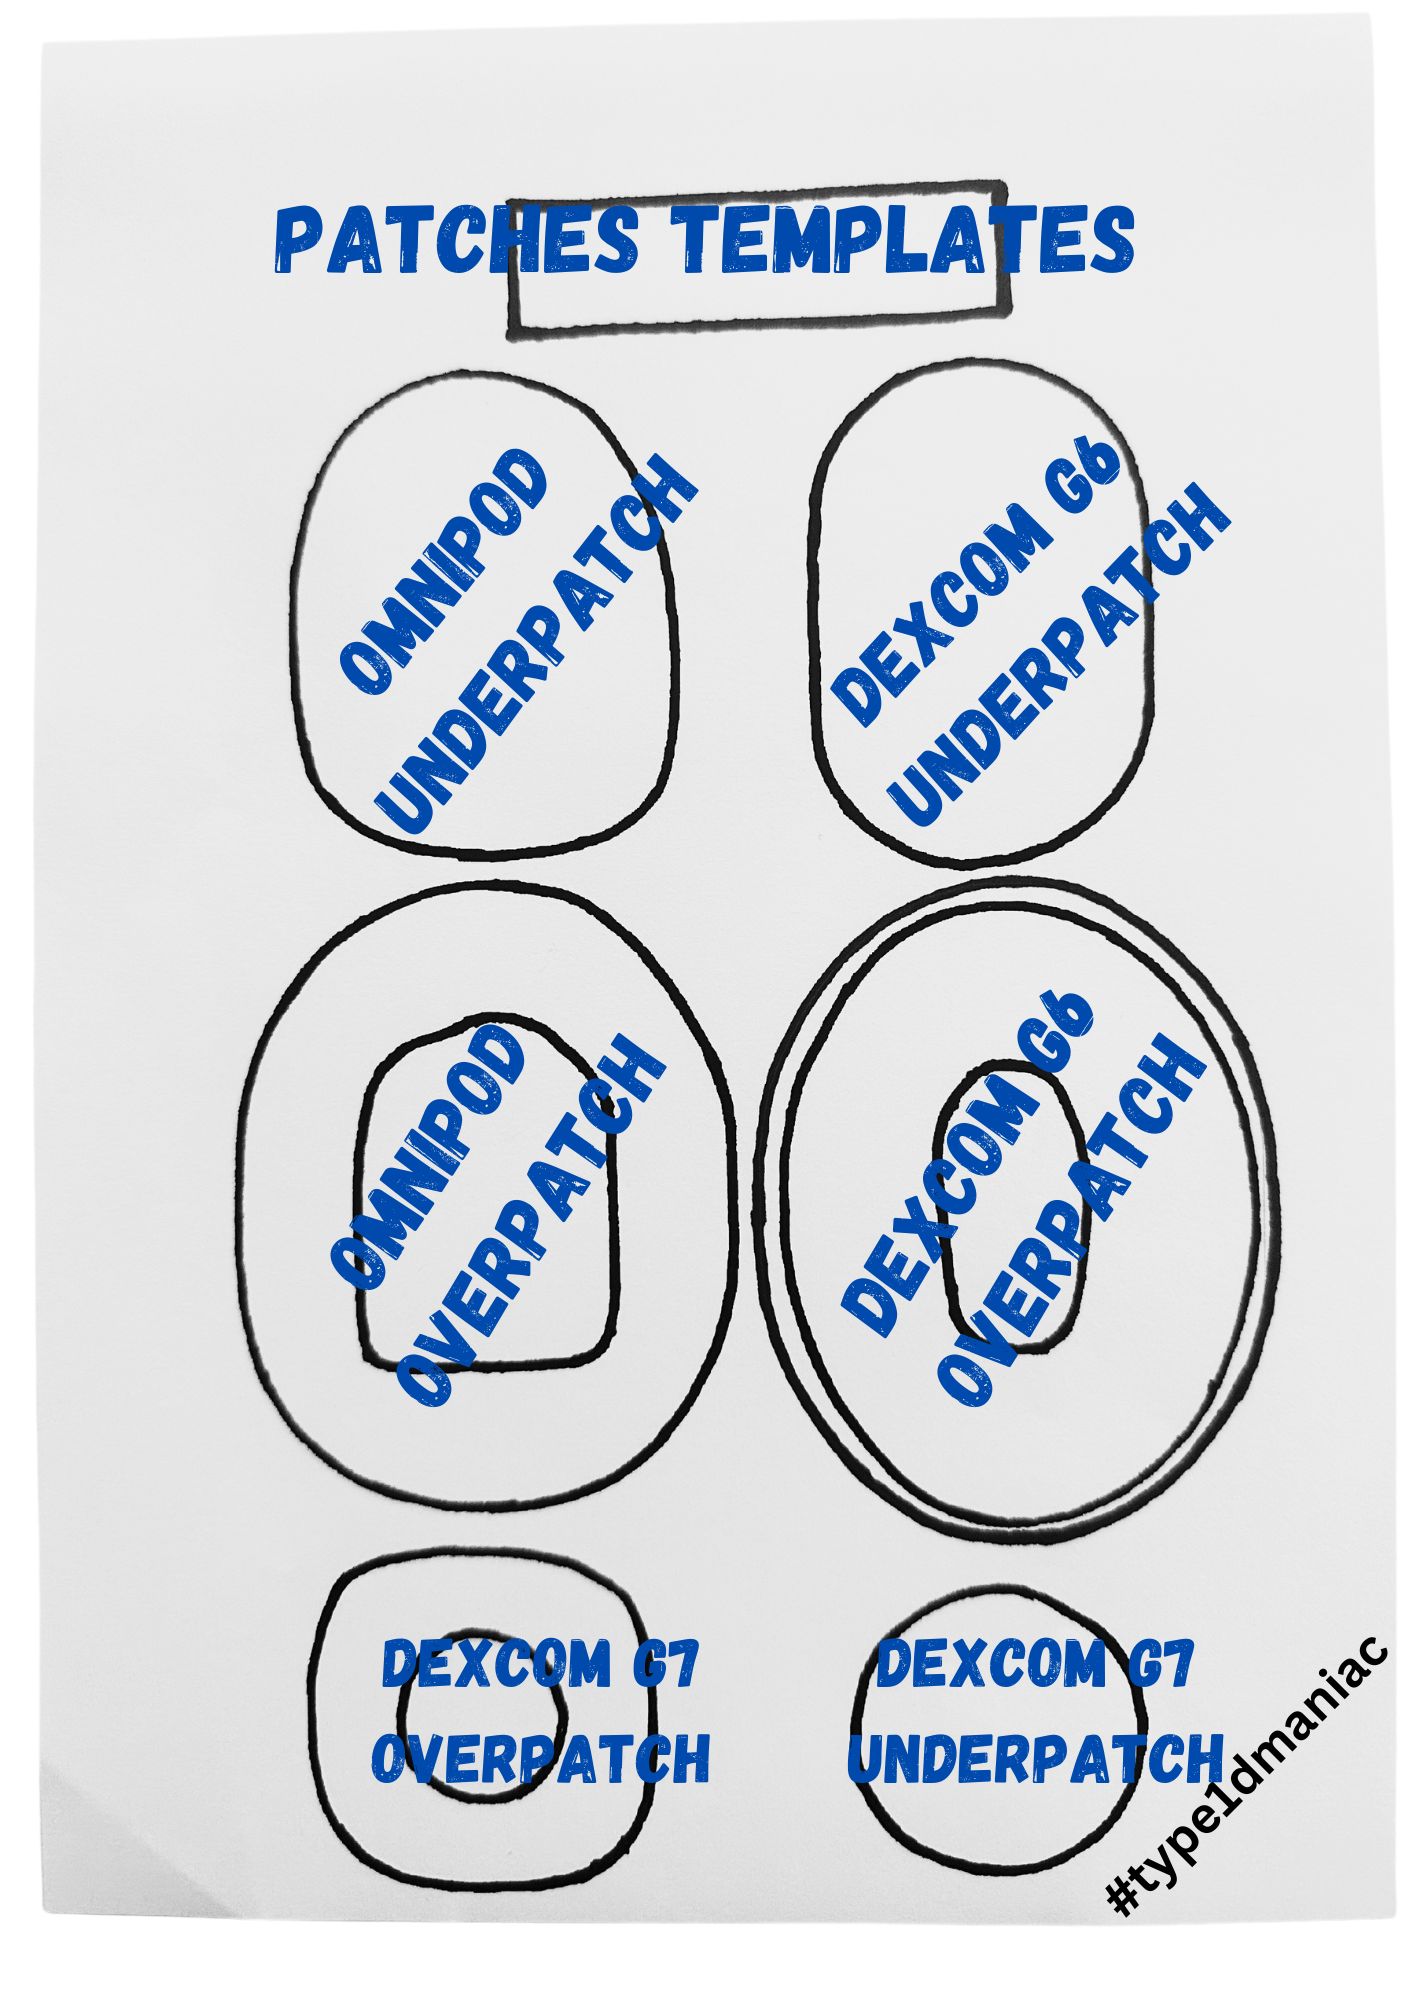
I use liquid glue to secure the Fixomull adhesive foil and the medical device patch. Once your medical device is securely attached, I highly recommend using an overpatch as well. In Slovakia and the Czech Republic, you can request original overpatches for Dexcom G6 for free, or you can find various options on the market. In Italy, I tried everything to get them, but unfortunately, the distributor seems unaware of their existence. However, I discovered that they are not as effective for us compared to Fixomull. So, I started making my own overpatches for Dexcom G6 and Omnipod, and they work incredibly well!
My daughter, found helpful for feeling confident and secure vet wrap. It’s really easy to use. However, I personally don’t like it as much because it tend to scratch the skin on the opposite side. While vet wrap can provide extra support for her medical devices, it can sometimes cause discomfort and even hurt the skin. However, we have discovered a better alternative – rubber bands from Italian family company New 3D, Italy. These rubber bands offer a stylish and effective solution, providing protection for both, the device and the overpatches.

You can also find similar alternatives in Slovakia (from the Czech Republic), but I love these because they have also version that cover the overpatches. However, when using Fixomull underpatch and overpatch along with Skin Tac, we often find that we don’t need any additional support to protect the patches from premature removal. The combination of these products provides a strong and secure attachment, giving us peace of mind during water activities and everyday life. It’s reassuring to know that our medical devices are well-protected, allowing us to fully enjoy our time without worrying about patch integrity.
My secret tip: NEVER remove the vet wrap or band before your patches are completely dry. You may notice that your patch starts to come off, but just keep it attached to the skin until it gets dry. The glue will attach to the skin again. This may seem simple, but believe me, with children, it can be quite a challenge to successfully complete this step when they see something “wanting to fall off” or once they are out of the water. However, it’s definitely worth it.
Adding a personal touch to children’s devices can be a fun way to make them more appealing. Stickers, tattoos, and other decorative options can add a touch of personalization. We have personally always enjoyed using products from 2 Czech family companies diapomucky.cz, known for their excellent durable stickers. DiaSamolepky is great option, offering personalized designs and outstanding customer service. Remember, making diabetes management a little more colorful and enjoyable can make a big difference for children.

After using the devices for their recommended lifespan, you may encounter some difficulty when it comes to removing them from the skin. To ensure a smooth and comfortable removal process, I highly recommend using a liquid adhesive remover. While wipes are available on the market, I find that the liquid version works best for this particular procedure. It lasts long and provides enough liquid to facilitate the gentle removal of the devices. This will help make the removal process much more manageable and ensure a positive experience for your child. We actually use already for a while liquid remover from Leukotape.
At the end of the day, the most important thing is to enjoy the summer with your kids and loved ones. While it may not be difficult to carry spare devices and provide replacements if needed, it can still add additional stress for both the child and the family. Dealing with a detached patch or a device failure can result in missing data or even interrupted insulin delivery. So, by taking the necessary precautions and using these tips to keep your medical devices securely attached, you can minimize the chances of such situations and fully embrace the joys of the summer season.
Lastly, I want to emphasize that none of these tips are sponsored. They are purely based on our personal experience and the methods that have worked best for us. We have tried various options over time and have found these strategies to be the most effective in keeping our medical devices secure during summer activities. My aim is to share these insights and help others facing similar challenges. Remember, everyone’s experience may be different, so it’s important to find what works best for you and your situation.
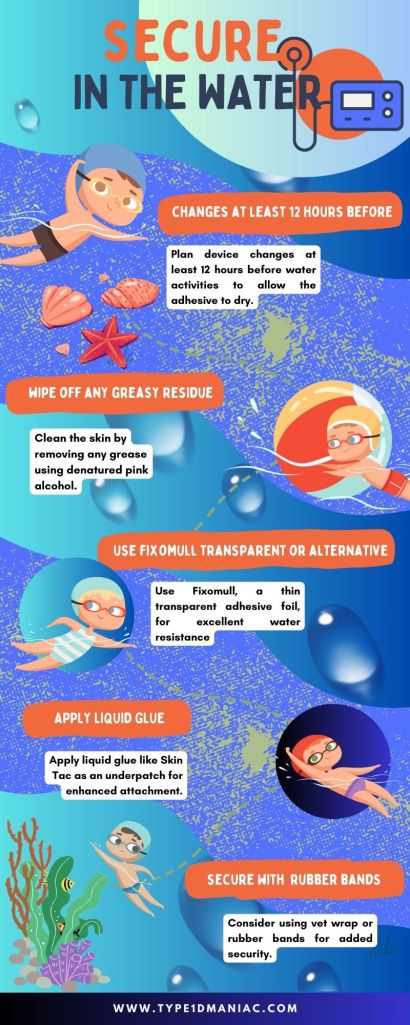
Summary of the steps mentioned in text:
- Plan device changes at least 12 hours before water activities to allow the adhesive to dry.
- Clean the skin by removing any grease using denatured pink alcohol.
- Use Fixomull, a thin transparent adhesive foil, for excellent water resistance.
- Apply liquid glue as an underpatch for enhanced attachment.
- Consider using vet wrap or rubber band for added security.
- Use a liquid adhesive remover for a smooth device removal process.

🙌🙌🙌followed all the steps above, VOILA, peaceful k fun day in the sea!🏝️🏝️🏝️🌊🌊🌊 Thanks Mirka!!! Super Brava!!!
LikeLike